When your air conditioner breaks down, you should start by checking whether the breaker that powers the unit is switched on. If it is, you can try recalibrating the thermostat or changing the filter.
Next, you should check the ductwork for leaks and ensure that they are well-connected. Loose ducts cause 30% of heating and cooling energy loss. Contact Air Conditioning Repair Sherman Oaks for professional help.
Thermostats are vital components in a home’s air conditioning system, controlling the flow of coolant to ensure your home is kept at a comfortable temperature. But as with many household appliances, thermostats can develop problems from normal wear and tear. A faulty thermostat can lead to uncomfortable conditions, reduced energy efficiency, and higher utility bills. Recognizing the signs of a faulty thermostat can help you avoid the need for costly AC repairs and keep your home comfortable all year long.
The first thing to check is whether the thermostat is working at all. If the display screen is dark, it’s a sign that the batteries need to be replaced or that there is another problem with the unit. In addition, a thermostat that doesn’t read the current room temperature or change its settings can cause the cooling system to run longer than necessary and waste energy.
It’s also important to clean and calibrate the thermostat regularly. Dust and debris buildup can interfere with the sensor, leading to inaccurate readings. With the power source off, remove the cover and use a soft brush or compressed air to clean the unit. Also, make sure that the wiring connections are secure and in good condition.
A faulty thermostat can also lead to overheating and even engine damage in some cases. The thermostat is responsible for regulating the flow of coolant from the radiator to the engine. The thermostat is normally closed until the engine warms up, and then gradually opens to allow the coolant to reach the radiator. However, a malfunctioning thermostat can become stuck open or closed, which can cause severe engine damage.
In some cases, a faulty thermostat may not be able to be repaired and will need to be replaced. While it’s tempting to save money by installing a new thermostat yourself, it’s best to leave it to a professional. Trying to install a thermostat yourself can lead to improper installation and serious issues down the road. A qualified HVAC contractor will be able to diagnose and repair any thermostat problems quickly and effectively, saving you time, hassle, and money in the long run.
Dirty Air Filter
There are a lot of factors that go into how quickly an air filter becomes dirty. One of the biggest reasons is a home with ducts that have holes in them. The dust of your house, attic, and insulation can all make its way into the ducts and eventually get to your HVAC system. When this happens, it’s not uncommon for the dirt to settle in your filter, clogging it up and making your AC break down.
Another factor is the weather outside. High temperatures can cause more air to be cycled through your system, causing the filter to clog up quicker than usual. When a filter is clogged, it can’t capture as many airborne pollutants and allergens. The result is poor indoor air quality and an increased risk of allergy or asthma symptoms.
An air filter will also become dirty due to pet hair and dander. If you have pets in your house, it’s crucial that you clean and vacuum frequently. If not, all of that hair and dander will work its way into your ducts, where it can be circulated throughout the house and back into the air you breathe. This is a big reason why you need to be diligent about changing your air filter every 1-3 months.
If you have a reusable air filter, it’s much easier to change. However, reusable filters still need to be cleaned regularly. This is because they are prone to gathering a buildup of dirt on the surface, which can lead to them becoming clogged and ineffective.
A dirty air filter can also be caused by an overabundance of dirt. If you have a very sandy backyard, for example, it can be easy for the dirt to work its way into your HVAC system and clog up your filter.
Changing your air filter is an out of sight, out of mind maintenance task that can have major consequences if neglected. It’s an inexpensive solution to keeping your home comfortable and your air conditioning repair costs down. To ensure that your filter is working as it should, be sure to change it at least every three months and schedule annual preventative services with a local technician.
Damaged Compressor
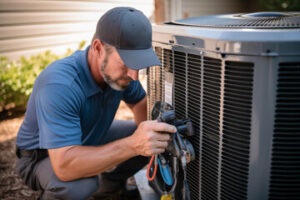
The compressor is the heart of your air conditioning system. It is responsible for converting refrigerant into the low-pressure, high temperature gas that cools your home. However, the compressor is prone to damage from mechanical problems and electrical issues. It is important to recognize the signs of a damaged compressor so that you can schedule repair service before the compressor fails completely.
A faulty compressor can cause many problems, but the most obvious symptom is an inability to produce cool air. If your air conditioner is not producing cold air, the first thing you should do is check the thermostat to make sure it is set to the right temperature. If it is, you should check the condensing unit for a problem with the compressor, which might be indicated by a shaking when the compressor turns on, or by rumbling and banging noises, clicking, clattering, screeching, growling, or popping sounds.
Other signs of a failing compressor include excessive cycling on and off, which means that the compressor is overworking to keep up with cooling demand. It might also produce unpleasant odors. Additionally, the compressor might be leaking oil, which will strain other A/C components and starve them of lubrication.
Finally, a failing compressor can overheat, which causes the electrical circuits to overload. This will cause the compressor to shut down, causing the system to stop working. If this keeps happening, it might be time to call for air conditioning repair.
It is important to note that, in some cases, a failed compressor can be saved by a simple re-charging of the refrigerant. However, this is something that should only be done by an experienced technician. Unqualified repairmen may fill the system with an inappropriate type of refrigerant, which can ruin your compressor and cause expensive damage to other components of the A/C system.
The above issues can be easy to diagnose and resolve with some help from a knowledgeable air conditioning repair professional. However, other issues might be more difficult to detect without the help of a professional. Luckily, there are a few early warning signs of a failing compressor to watch out for so that you can have a technician come in and perform a thorough inspection before the compressor fails.
Dirty Condensate Drain
Underneath your air conditioner’s evaporator coil, there is a drain pan that catches condensation and then funnels it away through a PVC pipe to either a floor drain or outdoor location. In a humid climate, this line can become clogged with dirt, mud, sludge, or debris.
If the clog becomes severe, water backs up and stops your air conditioner from working. Fortunately, it is easy to flush this pipe yourself with a little distilled vinegar. It is important to note that the first step in this process is always to shut off power to your air conditioner. You should turn off the thermostat as well as the circuit breaker at your home’s panel.
Once the system is shut down, you should be able to access the drain line by either removing your air conditioner’s vent tee access cap or unscrewing the PVC pipe itself. You should also vacuum the area around your indoor unit to remove any dirt and debris that may be present.
The next step is to put a garden hose in the drainage line and attach it at the drain line’s exit point (inside your house or outside the home). Begin by turning on the hose for short bursts of only a few seconds each. This will force water through the clog and break it up so that it can be flushed away with the next drain cycle.
You should repeat this process several times, putting the hose on and turning it off as needed until you see that water is flowing cleanly through the drain line again. If the clog is still present, you can try using a wire tube brush.
Once you have a clear drain line, pour one cup of distilled white vinegar into the vent tee access point. This will kill any bacteria, algae, or mold that may be residing inside the drain line and prevent them from growing again in the future. After a few hours, pour water into the vent tee access point to test for proper drainage. If the clog is not a problem anymore, you can replace the drain cap and your air conditioning will function normally again.